How to share multiple Google calendars with someone, using a simple single link?
Google Calendar has a built-in tool for creating a combined view of multiple calendars that can be shared with a single link or embedded on a website. When you use this tool, Google generates two things: a direct URL that anyone can open in their browser to see all selected calendars together, and an HTML embed code for website developers who want to include the calendar on their website. The “single link” in the article title refers to the combined-calendar URL that you can share.
Why combine multiple calendars into one view:
Instead of asking someone to subscribe to or follow each of your calendars separately, you can create one combined view showing all relevant calendars together. This is useful for: team schedules (showing team members’ availability in one place), business hours (combining office calendar, holidays, and special events), or shared family calendars (showing everyone’s schedules side-by-side).
How to create and share a combined multiple-calendar view:
Step 1: Open Google Calendar and navigate to settings
Open Google Calendar at calendar.google.com.
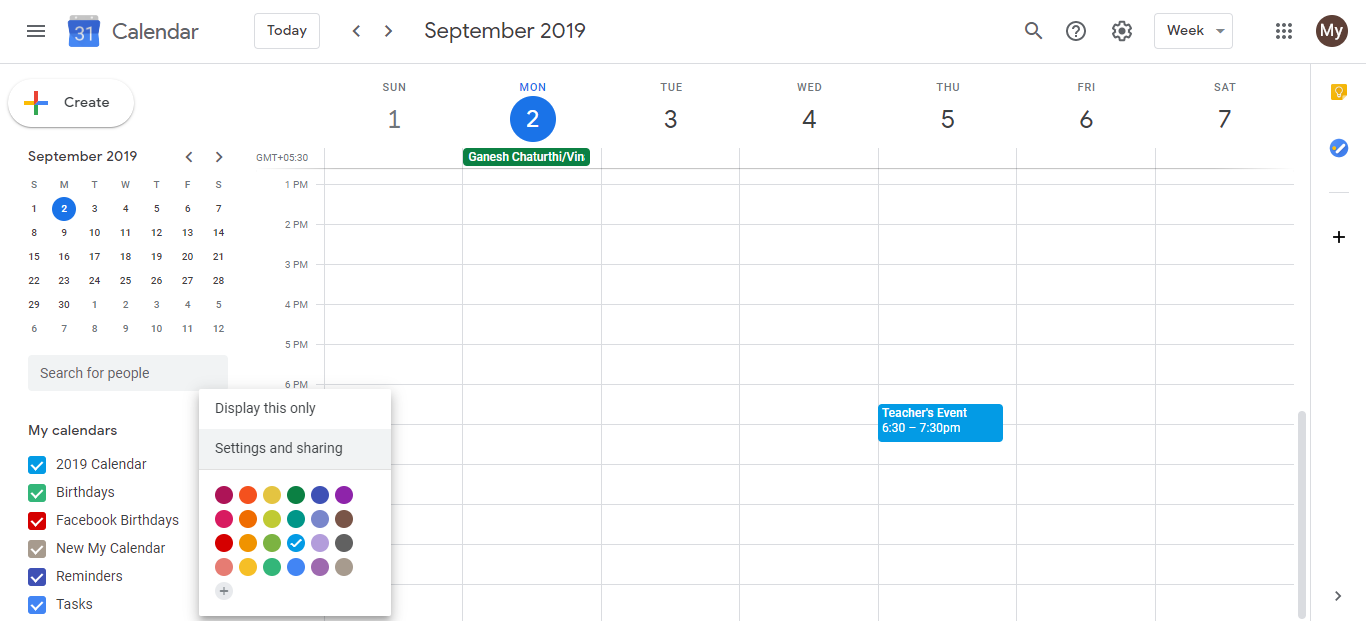
On the left sidebar, click the menu icon (three horizontal lines) if it is not already visible, or click Settings near the top right.
Click Settings to open the full settings page.
Step 2: Find the Integrate Calendar section
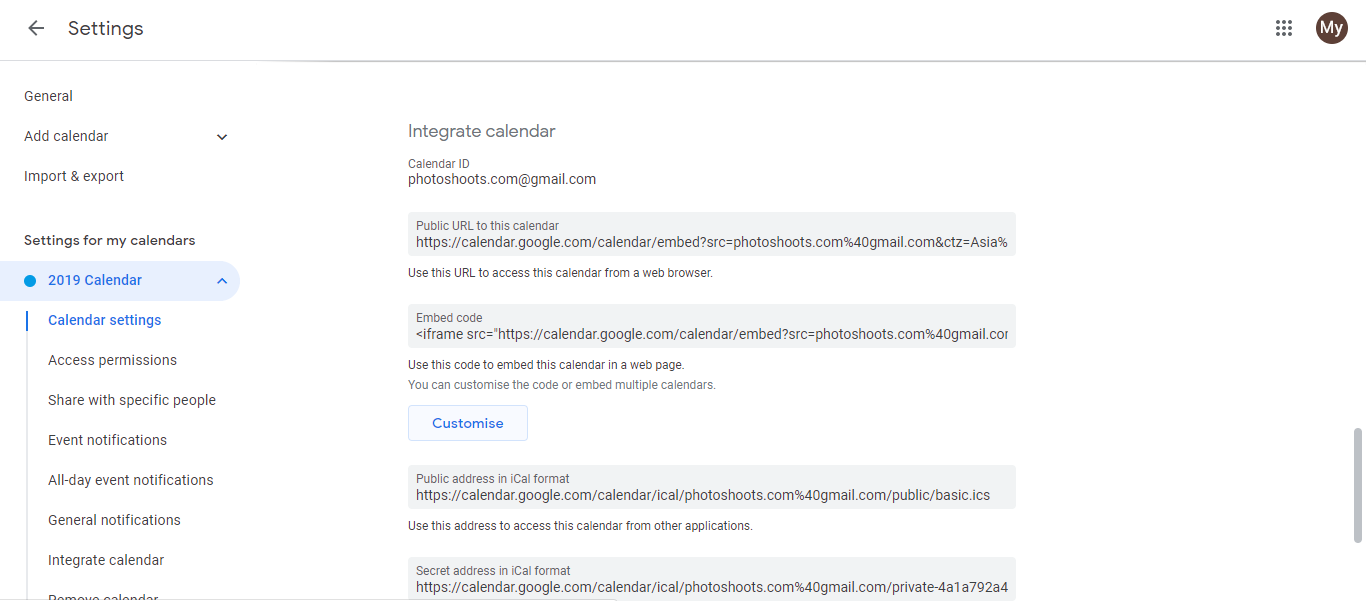
In the left sidebar, locate Event Settings or scroll down to find the Integrate calendar section. This section may also be labeled as Embedded calendar in some versions.
Under Integrate calendar, you will see a Customize button (usually displayed in blue). Click on it. This button opens Google’s multi-calendar configuration tool.
Step 3: Configure which calendars to include
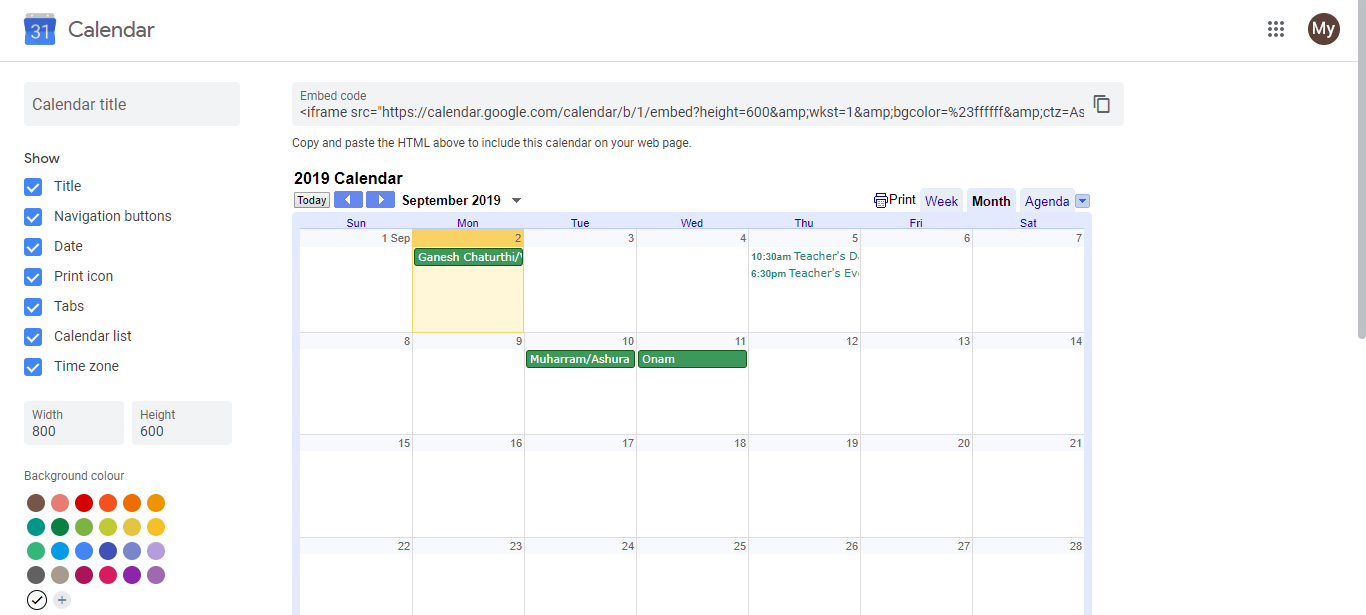
- A new browser tab or window will open showing the Google Calendar customization tool. You will see a preview of the calendar on the right and customization options on the left.
On the left side, you will see a list of your calendars. Each calendar has a checkbox next to it.
Check or uncheck calendars to determine which ones appear in the combined view. Only calendars with checkmarks will be included in the final link.
Step 4: Customize colors and appearance
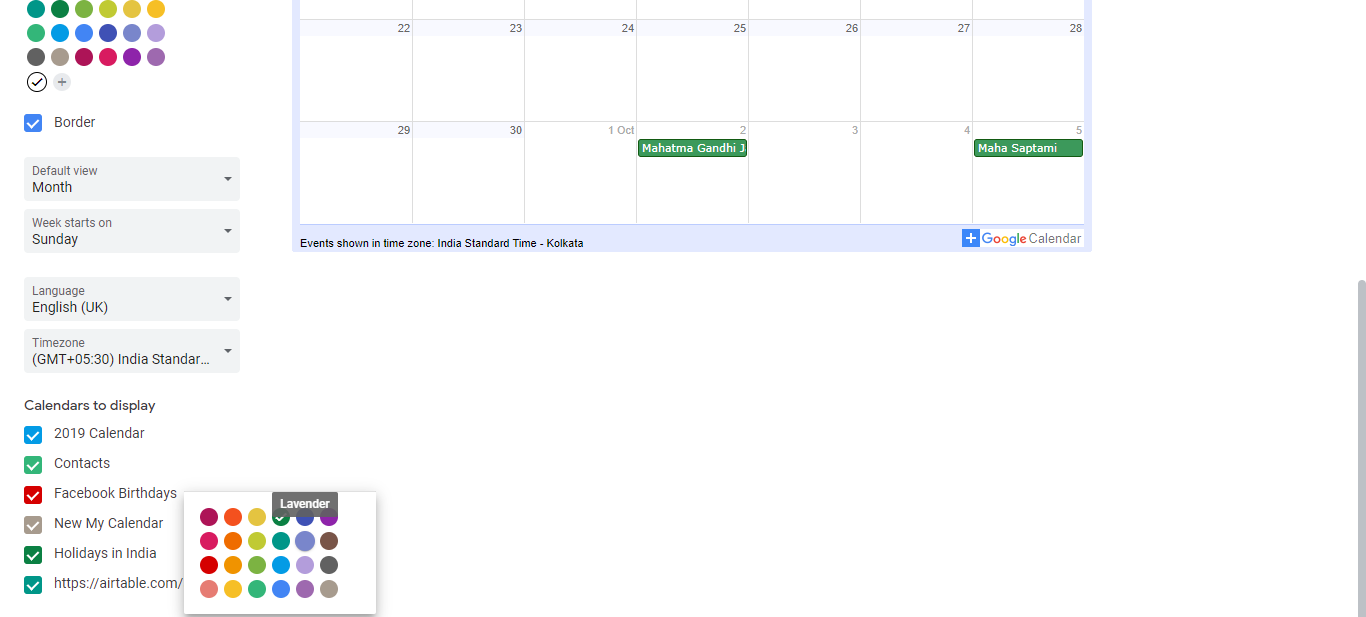
Below the calendar list, you will see options to customize the appearance:
- Calendar colors: Click on the colored square next to each calendar name to change its display color in the combined view.
- View type: Select whether to display the calendar as Month view (calendar grid), Agenda (list view), or Upcoming (upcoming events only).
- Language and timezone: Adjust these settings to match your audience’s preferences.
Step 5: Copy the HTML embed code and extract the direct URL
At the top of the customization tool, you will see two options for sharing your configured calendar:
- HTML embed code: A block of HTML code (starting with
<iframe src=) that you can copy and paste into a website. Website developers use this to embed the calendar view directly on a web page. - Direct URL: Look in the browser’s address bar at the top of the customization page, or in some versions, there is a “Get the link” or “Copy link” button. This is the direct URL that opens the combined calendar view in a browser.
- HTML embed code: A block of HTML code (starting with
To get the direct URL for sharing: Copy the address from the browser’s address bar (it will start with something like
calendar.google.com/calendar/embed?...). This is the link you can share with anyone.To get the HTML embed code for a website: Copy the code block shown in the customization tool. Website owners can paste this code into their website’s HTML to embed the calendar view.
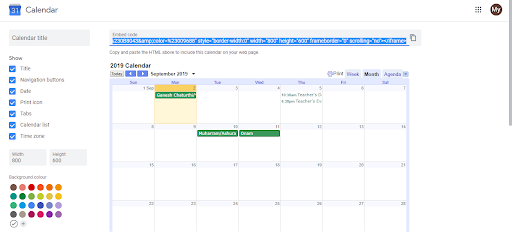
Step 6: Share the link or embed code
To share the link: Send the direct URL via email, message, or social media. Anyone who opens it will see the combined calendar view in their browser. They do not need a Google account to view it.
To embed on a website: Website developers can paste the HTML embed code into their website. The calendar will then appear directly on that website, updated in real-time.
What people will see when they open the shared link:
When someone opens the combined calendar link, they will see:
- All selected calendars displayed in one view
- Each calendar’s events shown in the color you assigned
- A read-only view (they cannot edit events or calendars)
- The ability to navigate between months or view upcoming events (depending on the view type you selected)
- No requirement to sign in with a Google account
Changing the combined calendar later:
If you need to change which calendars are included, adjust colors, or modify the view type, return to the Customise tool (Settings > Integrate calendar > Customize) and make your changes. This will generate a new HTML code and link. If you have already shared the old link, you will need to share the new link with your audience, or update any embedded code on websites.