How to integrate Airtable with Google Calendar?
Airtable does not have a direct native integration with Google Calendar. However, there are two primary methods to connect them: a simple read-only calendar view subscription, or a bidirectional automation using a third-party tool like Zapier.
Method 1: Subscribe to Airtable’s shareable calendar view (simple, read-only)
If you have an Airtable base with date fields, you can create a calendar view and share it with Google Calendar as a read-only subscription. This method requires no additional tools.
Open your Airtable base.
Create a Calendar view (click the + button at the bottom to add a new view, then select Calendar).
Configure the calendar view to use the appropriate date field (e.g., “Event Date” or “Due Date”).
Click the Share button for the calendar view.
Under Shared links, click Create a shared link (or Create a shareable calendar view link if labeled differently).
Copy the URL that is generated.
Open Google Calendar at calendar.google.com.
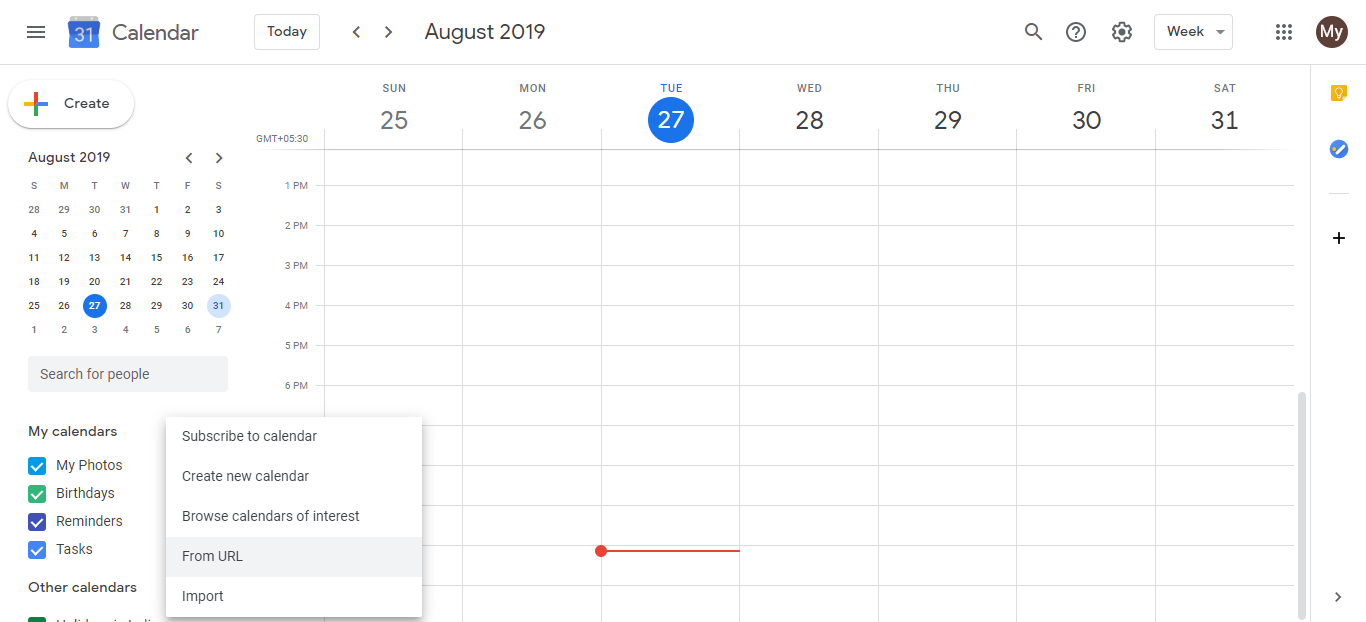
Click the + button next to Other calendars in the left sidebar.
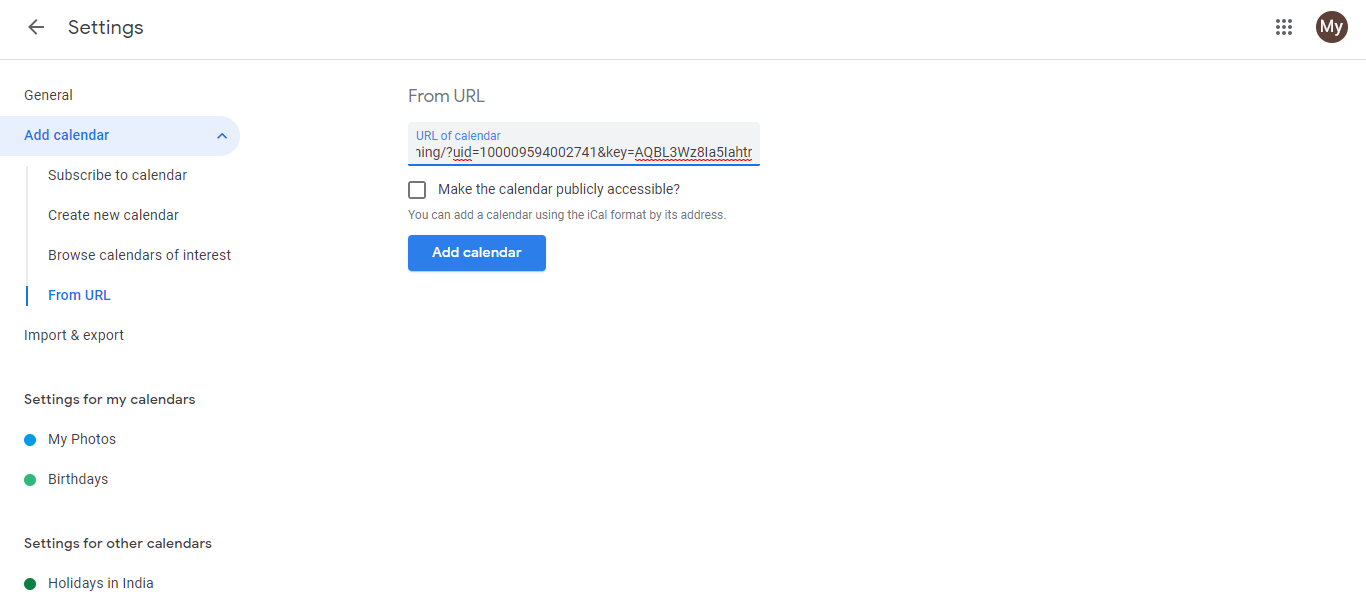
Select Subscribe to calendar or Add from URL.
Paste the Airtable calendar URL into the field.
Click Add or Subscribe.
The Airtable calendar now appears in your Other calendars list. This subscription is read-only: you can view Airtable events in Google Calendar, but cannot edit them from Google Calendar.
Method 2: Use Zapier for bidirectional automation (two-way sync)
For more powerful automation where changes in Airtable create or update Google Calendar events, and vice versa, use Zapier or a similar automation platform.
How a Zapier integration works:
Zapier connects apps through “Zaps” (automated workflows with a trigger: what happens in one app, and an action: what happens in the other app). In this case:
- Trigger: A new or updated record is created in Airtable
- Action: A corresponding event is created in Google Calendar
Setting up a Zapier Zap for Airtable to Google Calendar:
Sign up for a Zapier account at zapier.com.
Click Create a Zap (or Create Zap).
Choose the Trigger App: Select Airtable.
Choose the Trigger Event: Select New record (or Updated record if you want to sync changes to existing records).
Connect your Airtable account and authorize Zapier to access your base.
Select your Airtable base and the specific table containing events.
Choose the Action App: Select Google Calendar.
Choose the Action Event: Select Create event (or Update event if you want to update existing calendar events).
Connect your Google Calendar account and authorize Zapier.
Map the fields: Tell Zapier which Airtable columns correspond to which Google Calendar event details:
- Event title (maps from an Airtable text field, e.g., “Event Name”)
- Event date/time (maps from an Airtable date field)
- Event description (maps from an Airtable description or notes field)
- Event duration (optional, if you have a duration field)
Test the Zap to ensure the mapping is correct.
Turn the Zap on to activate the automation.
From now on, whenever you create a new record in the specified Airtable table, Zapier automatically creates a corresponding event in Google Calendar with the details you mapped.
Comparison of the two methods:
| Feature | Airtable Calendar View | Zapier |
|---|---|---|
| Ease of setup | Very simple | Moderate |
| Cost | Free | Free tier available (may need paid for heavy use) |
| Read or write | Read-only to Google Calendar | Bidirectional (both directions possible) |
| Real-time updates | Good | Good |
| Editing in Google Calendar | No | Yes (with Zapier setup) |
Choosing between the two methods:
- Use the Airtable Calendar View method if you only need to view Airtable events in Google Calendar and do not need to create or edit Google Calendar events that flow back to Airtable.
- Use Zapier if you need two-way sync where changes in either app trigger updates in the other, or if you need to create Google Calendar events from Airtable data.